The new Engine is fitted .....
Preparing for the new engine
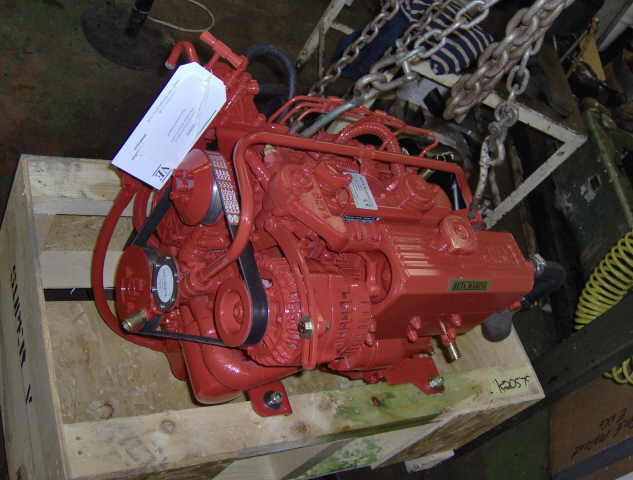
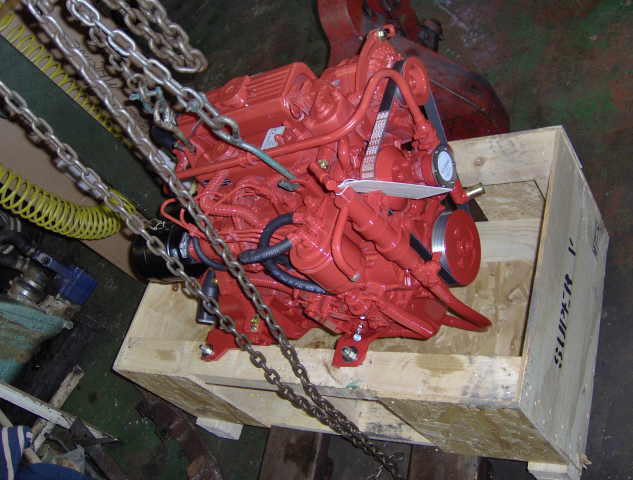
Today the engine arrived and my mechanic is busy preparing it for install. This basically means checking the mounting points and how we will run all of the associated plumbing.
The engine with it's 100A Alternator and special belt, this also has fittings to allow me to connect up to calorifier, so hot showers on board now!
The Sump Oil Pump (Trying saying that fast 10 times) was the main reason for
choosing this engine,
the very luxury of just pumping up and down with none of the usual nonsense, I
can't wait.
Day 7 (5 hours)
Removing the drip tray and cleaning the hull
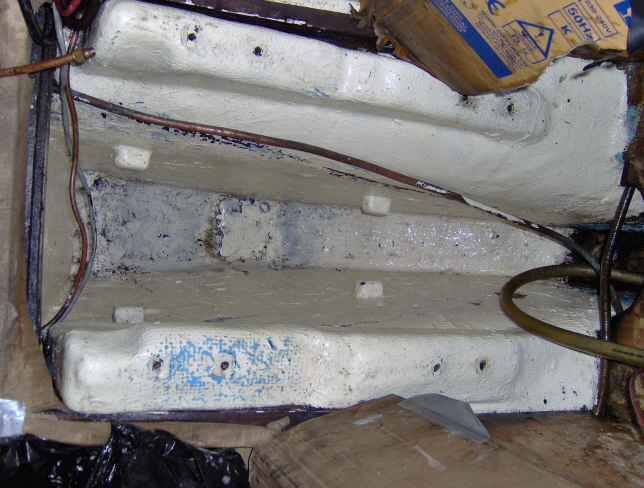
Today I spent an hour with Geoff the engineer measuring up the supports for the new engine. Geoff ran a length of string from the centre of the prop shaft to the front of the engine box. this was secured so that we could see the centre line that the prop would follow. The string, by the time it reached the front was about 3 inches to starboard of centre. From this Geoff worked out that the width was the same and the rear mounts would need to be 1/2 inch higher and the front mounts more than an inch higher. The plan is to glass and bolt in some steel supports over the original supports.
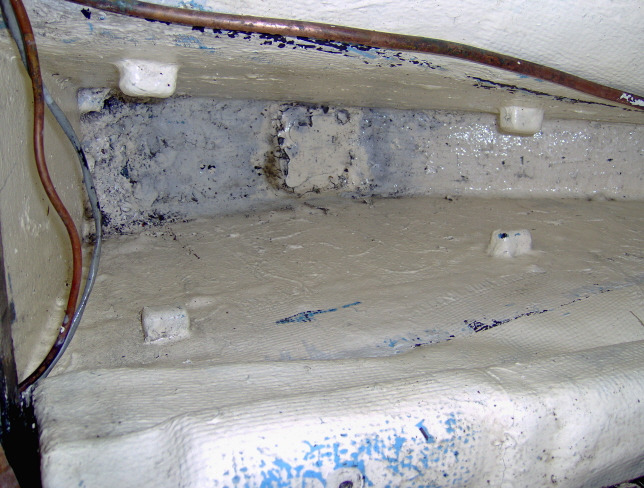
The next job today was to remove the drip tray and clean out
below. I worried this could be a massive undertaking but as with all boat jobs,
if you take a slow methodical attitude, and also think laterally then the jobs
are never quite so bad.
I had worried the tray was glassed in, but in fact it sits on supports and is
sealed around the edge with some kind of Siklaflex/3M sealant, I used a
combination of saw, chisel and Stanley knife to break to sealant, once this was
done the tray just lifted out. Another very oily bit of boat to clean up.
The extent of oily sludge and gunge under the tray was terrible. I had expected it to be bad as no amount of attempts to clean it before had made any difference. At least now I could make it spotless, and with care when putting oil into the engine, I should be able to keep it clean. I still haven't decided if I should replace the drip tray?
Click on the images below for a bigger picture and details, hover mouse over picture for short description.
|
|
|
|||||
|
|
|
|||||
|
|
|
|||||
|
|
|
|||||
|
|
|
||||||
Day 8 (9 hours)
Today was spent doing a thorough clean of the bilges and the areas under the
cockpit. Scrubbing with a detergent then pressure spraying worked well.
On inspection one of the cockpit drain hoses, starboard, was worn so that was
replaced, it's much easier to do from the engine compartment than from the
lazaret. The fuel pipe was removed as this was quite old, perhaps the original.
Annoyingly one end was 1.25 ID and the other end 1.5 inch ID. To remove the fule
pipe I had to lift some of the port side slats above the water tank, I have lost
count of the number of times I have had to undo those slats!
More crawling around revealed that the exhaust outlet was 40mm and it needs
to be 50mm, more cost and hassle. The old exhaust pipe was removed and measured
for length.
A hole was cut for the new Beta control panel, which is slightly larger than the
old Volvo panel, and will require some ingenuity to make it fit into the control
panel box in the cockpit.
Finally I removed all of the old oil stained cardboard and replaced it with new clean card as I have now removed everything oily from the boat. The intention is that no more oil or oily eater will make it to the bilges ever again!
Not a lot for 9 hours of work really, also it blew a force 8/9 all day so couldn't do much outside.
Day 9, 10, 11 and 12 (lost count of the hours, just want it to end now)
First I fixed the dripping tap in the galley, this was because the fuel tank
bilge was ever so slowly filling with water and I traced it to a very small
trickle running down the bilge, this also explained the constant sogginess of
stuff under the sink!
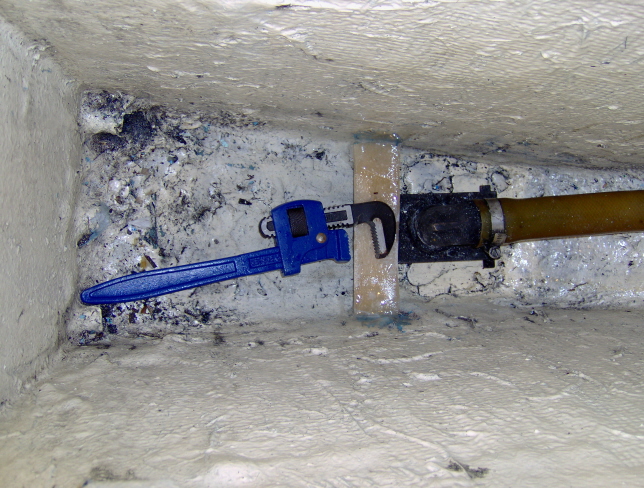
More cleaning followed. On Saturday, I ran the new exhaust from the stern to
near the engine, while lying in dripping water I vowed to fix that drip from the
calorifier soon. The new exhaust is 50mm I/D as opposed to 40mm so besides the
new transom fitting I had to enlarge the hole in the rear bulkhead by the
quadrant, now that is a lovely spot to work in, in order to get to it I had to
remove the fresh water pump, which revealed a rusty hose clip I hadn't seen
before. When will it stop..... I go home in despair
Sunday, and a revived attitude, I drill out the transom ready for the new
exhaust outlet, and I try to cut out the cutless bearing, see the
stern gear
page for that joyous encounter. I fail so go home deflated again.
Monday, arrive with a hangover and one mighty reciprocating saw, this cutless
bearing is going to regret ever coming near my boat. Very quickly it is
dispatched and the new bearing fitted. I rejoice and decide I can take it easy
for the rest of the day.
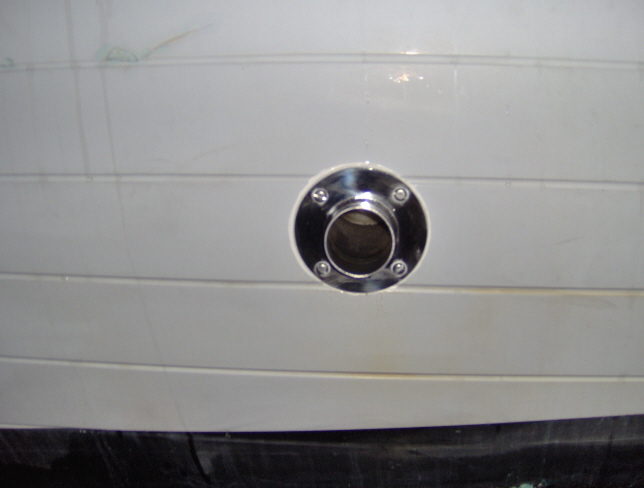
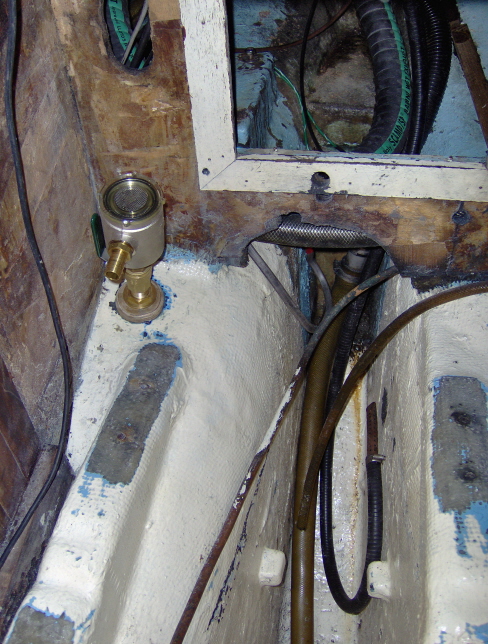
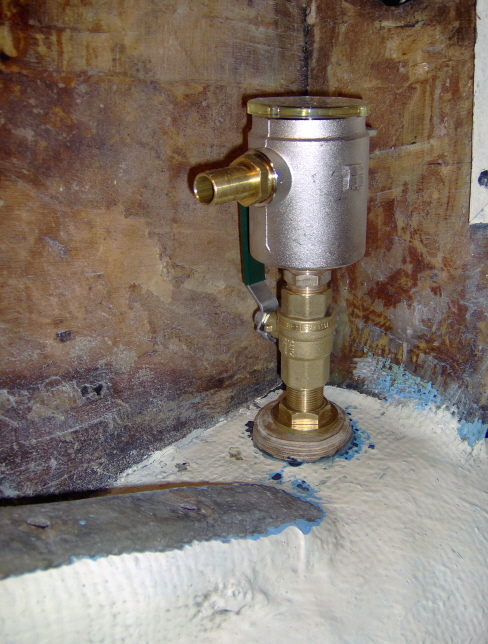
Tuesday, Fit exhaust fitting on transom, and glass in a small shelf
in the deep bilge to hold the pumps strum box in place. I also close my eyes and
drill a hole through the hull inside the engine compartment, not sure where it
will pop out. I hope it is on a flat part of the hull. This is for the new water
intake. The old one is in the lazarette and is impossible to reach without first
spending 15 minutes emptying that locker. The new one is right next to the
engine. Pictures below.
Tony at Steve Roberts, Now I have to big up Tony who mans the local chandlery, a most helpful guy who is as useful for his anecdotes as for bits and bobs ranging from a little stainless bolt through to a big stainless bolt. Seriously, Tony has supplied me with many of the parts on Stardust, and we have taken them all the way to the Caribbean and back. It seems like I can't go more than a day working on the boat without the need to pop into Tony's and pickup up something. Today he supplied the Sealant for the exhaust as all my stock on the boat has gone off, and it's only 3 years old! Cheers Tony,
So hear are some pictures of the last few days work.
|
|
||||||
|
|
||||||
|
|
|
||||||
Day 15?
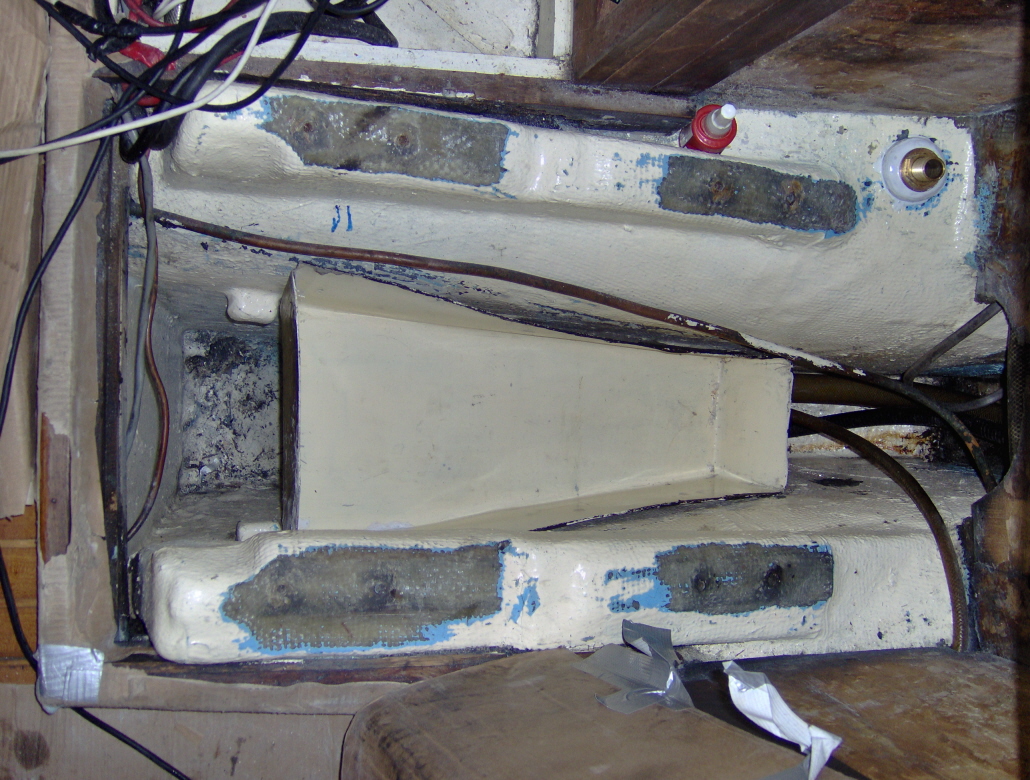
Today I shortened the drip tray under the engine. Click on the picture for a
bigger view.
This should allow me to clean out the bilge easier if anything nasty should ever
get down there.
In this picture you can see the new water inlet and also the area around the
mounts where I have
grinded off the paint and Gelcoat ready for the new mounts which will be built
up here.
|
|
|||
Day 155? (lost count)
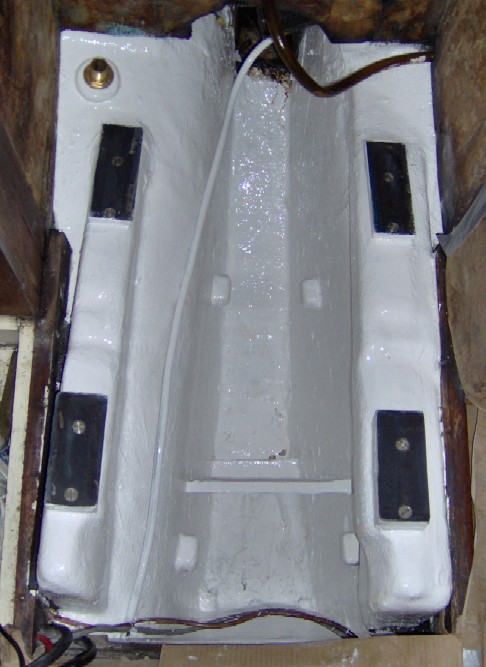
Today we craned the new engine into the boat. It is now in situ and I have
started connecting up all of the pipes and wires needed to make it work
It took about 30 minutes for the crane to get in place and lift the engine up
and over the boat. It went straight down onto it's mounts without touching
anything on it's decent.
Unfortunately we had already found that we had mounted two of the supports back
to front and had to re-engineer these. You can make out the mod in the pictures.
I am confident the fix will secure the engine well.
With the engine in place it was soon obvious that the exhaust system I had
imagined would not work. The outlet on the engine is on the wrong side, but more
importantly far too low. This means that the water trap would be at the same
level as the outlet which could cause water to run back into the engine and very
quickly destroy it.
A call to Beta soon solved the problem, For the very reasonable price of
'everything I had left' plus the promise of my first born, they would supply me
with a new exhaust manifold that would deliver the fumes to a spot awfully close
to where the old Volvo did.
Some pictures below. I now expect to spend about 5 days connecting everything up. Click on images for a larger picture)
|
|
|
|||||
|
|
|
|||||
|
|
|
||||||
Launch T-7 Days
I think we are getting close to launch now. The engine is aligned and fully
wired up. We just need to add fuel and water.
I need a propeller and when this arrives I can get Geoff to cut the shaft to
size and do the taper thingy.
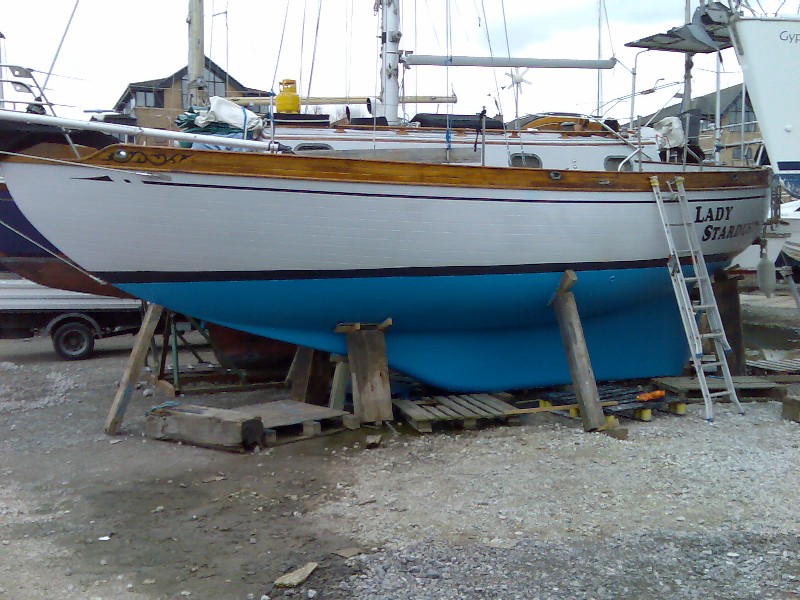
Today I slapped some antifoul on.
Click for bigger picture
|
||||